3d Boccia Ramp Model for Unity
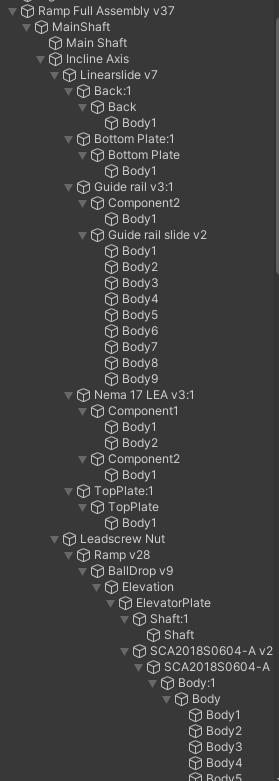
The original Unity ramp model was overly complicated. This is part of the Hierarchy of the old ramp model in Unity. Importing directly from the Full Assembly CAD file resulted in a messy and complex model with many more individual parts than necessary and a Hierarchy with as many as eleven or twelve levels of child components. (This isn’t even the whole Hierarchy)
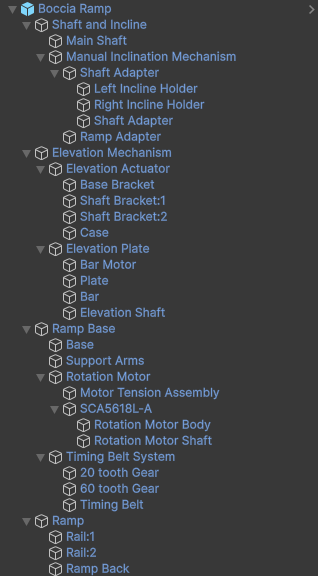
Below is the complete Hierarchy of the simplified ramp model. At most, the model has up to four levels of child components, with as few individual parts as possible.
It was important to simplify the ramp model as much as possible while still keeping some components separate, to make sure that the appearance of the model matched the real-life ramp as closely as possible.
To simplify and clean-up the ramp model, I first made a new model in Fusion360, and then imported it to a Unity project for further simplification (and to finalize the model as a Unity prefab). These are instructions in case we need to repeat the process with another updated model down the line:
In Fusion360
Create a simplified version of the 3D ramp model in Fusion360, then Export it as a file that can be uploaded to a Unity project.
- In a blank Fusion360 file, I started by inserting the design file of the wooden base and then went from there to insert the other ramp components.
- After inserting each design file, right-click on the component name in the browser and select “Break Link” so that any changes are not applied to the original design. (This will also allow you to rearrange components in the browser hierarchy.)
- To simplify the model:
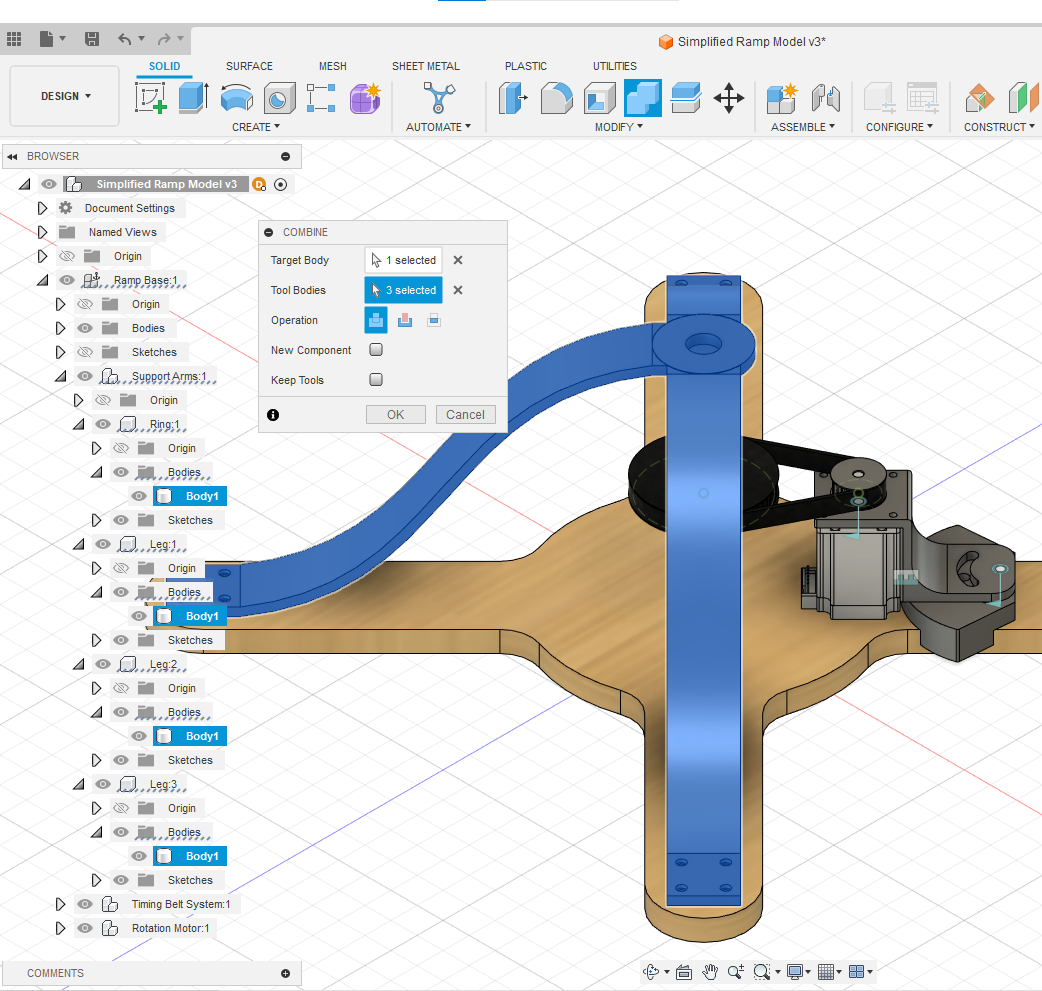
- Right-click and select” Remove” to get rid of any components that are not strictly necessary for the Unity model. (For example, the bolts, nuts, and washers in the rotation motor tension assembly.)
- When possible, combine the bodies of different components into a single body for simplification. (For example, combine the three support arms and the ring into one single body for simplification.)
- Drag bodies or subcomponents into different locations in the hierarchy to simplify the organization. For example, move the combined body of the support arms + ring out from under the Support Arms component and into the Ramp Base component. Since the Support Arms component is now empty (i.e. it does not contain any bodies), right-click and select “Remove”. Now the Support Arms body would directly be a child component of the Ramp Base.
- Note: The model should be as simple as possible while keeping certain components separate enough so that different appearances can be applied to have the digital ramp visually match the real-life ramp as closely as possible. For example, each of the two wooden rails and the plastic backing of the ramp were kept as separate components in the model, so that different Materials could be applied later in Unity to represent the wooden colour of the rails and the transparent appearance of the plastic.
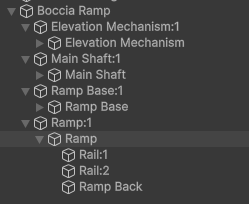
- (The simplified model as of September 4, 2024 is organized into four “sections” as the main parent components: Ramp Base, Main Shaft (which includes the incline parts), Elevation Mechanism, and Ramp.)
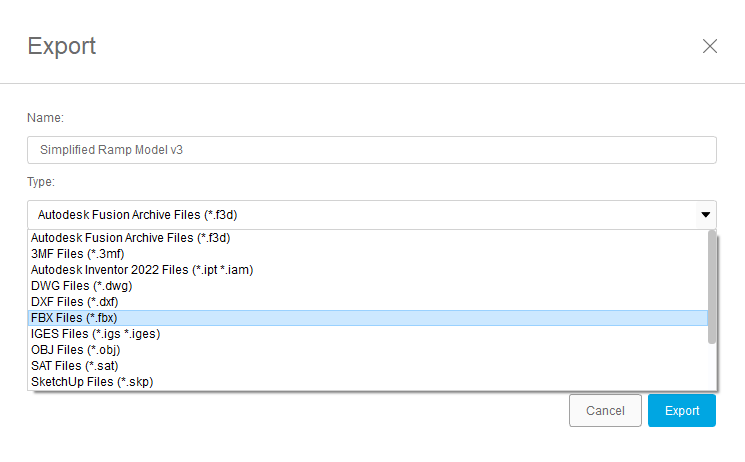
- Export the simplified ramp model from Fusion360 as a .fbx file.
In Unity
Import the 3D CAD model into a Unity project and make further simplifications and appearance changes to create a new prefab of the 3D ramp model.
- Drag and drop the .fbx file into a Unity project window under “Assets”.
- Drag the ramp model into the scene Hierarchy window. The colours of the imported model might not match the appearance of the model in Fusion, so it must be edited in Unity before it can be exported/saved as the finalized prefab.
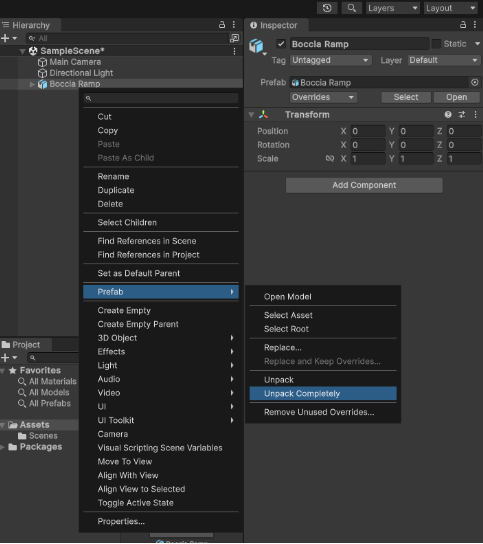
- Right-click on the model name in the Hierarchy and select Prefab > Unpack Completely. (This will let you rearrange components in the Hierarchy for further simplification).
- When Unity imported the file, it added an extra child component for each of the four main sections. For example, the “Ramp:1” parent component had an extra “Ramp” child component underneath it. And the two ramp rails and the backing were all child components of the “second” Ramp component.
- To simplify the Hierarchy, drag the child components into the “first” parent component, then delete the now-empty extra parent component.
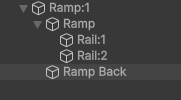
- (Ramp Back moved from “Ramp” to be a child component of “Ramp:1” only)
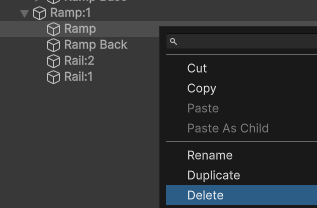
- (Delete the extra “Ramp” component now that it is empty)
- To simplify the Hierarchy, drag the child components into the “first” parent component, then delete the now-empty extra parent component.
- Create and apply new Materials in Unity to change the appearance of the ramp to more closely match the real-life prototype.
- Make the ramp model a prefab by dragging the model from the Hierarchy window and into the project window. Make sure all the Materials are also prefabs.
- Export the prefabs as a single .unitypackage file.
- Right-click on Assets in the Project window and select Export Package…
- Select which items to Export.
- The Unity package file can now be uploaded into any Unity project, so that the 3D Ramp Model and Materials can be used as prefabs.