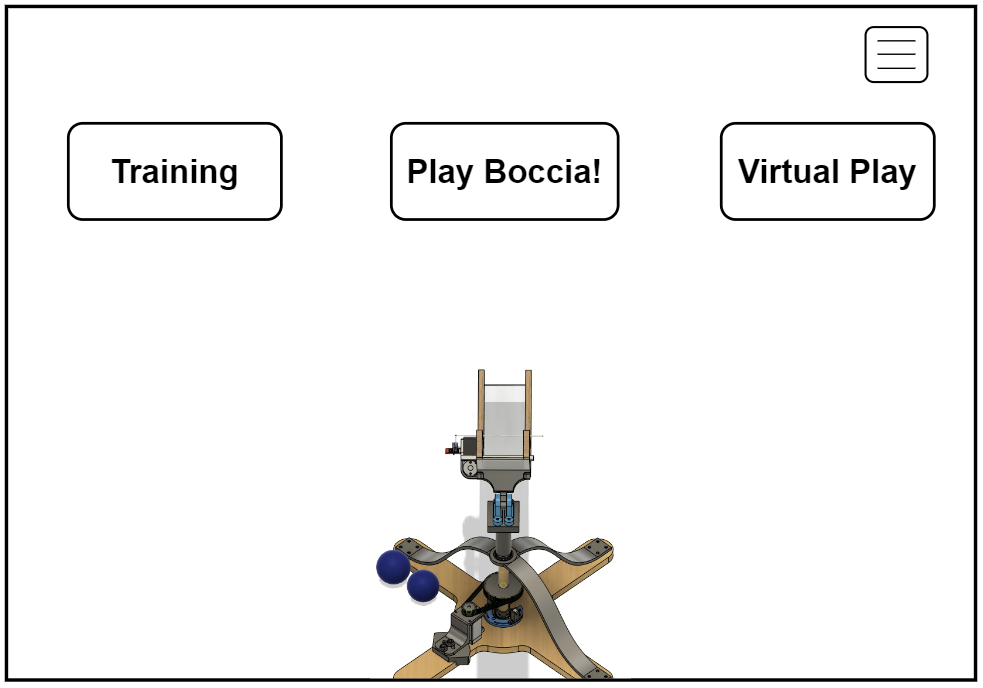
Ui Mockups
These are the simple UI mockups updated from Emily’s Original UI proposal. The changes are based on discussion from the 2024-09-05 UI Review meeting.
The main differences are in the ramp control mechanism (as described in Dan’s UI Review meeting notes). There are resulting changes to the Game Options menu, and some changes to the overall flow between menus and scenes.
The application will have two different modes of play:
- “Play Boccia!”, where the player will control the actual ramp device via BCI.
- “Virtual Play”, where the player will control a digital version of the ramp via BCI. This will allow the player to practice playing Boccia without requiring the physical ramp.
All game and UI components will be in world space.
Menu View
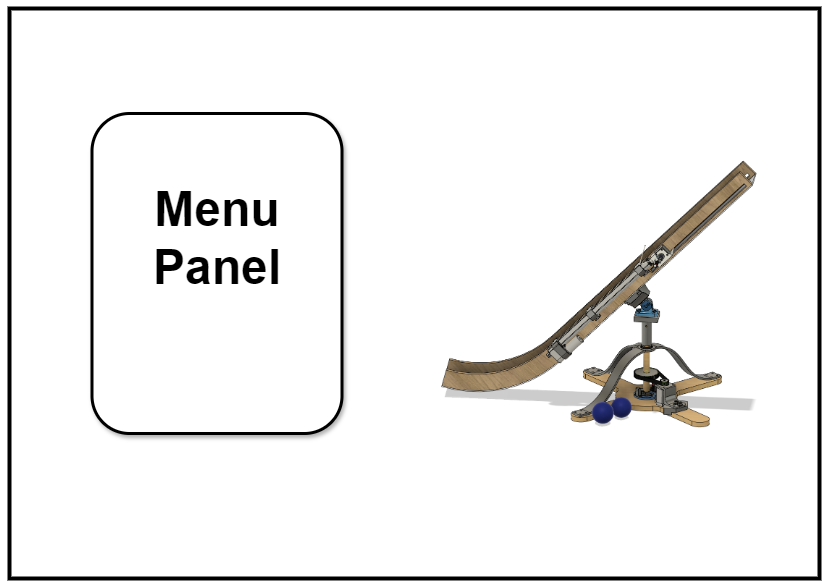
The Start Menu, Game Options Menu, and BCI Options Menu will have a consistent UI layout across the scenes. Those Menus and the ramp will exist in world space in two different planes. The Menus will be in the foreground and the ramp in the background. In the Menu View, the camera will be positioned to view the ramp from the side (Fig. 1). The menu panel will be located in the same spot, and change to the Start, Game Options, or BCI Options menu accordingly.
Start Menu
This menu will be the same as what Emily defined in the original UI mockups, with buttons for ‘Start’, ‘Game Options’, ‘BCI Options’, and ‘Quit’.
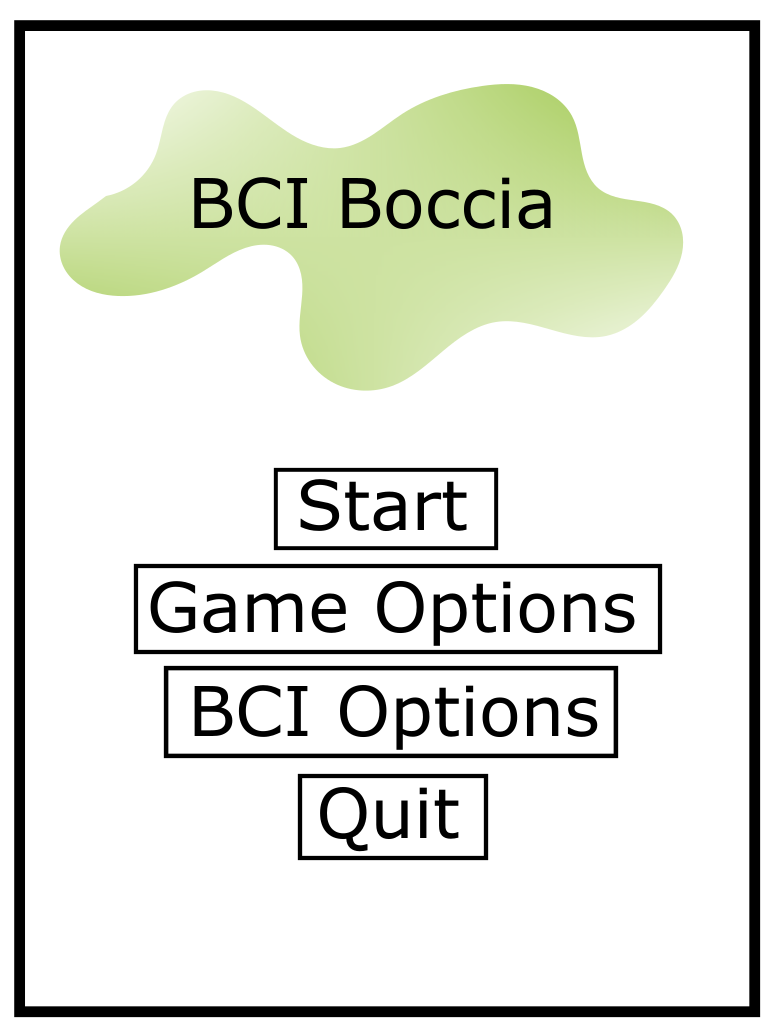
- The Start button goes to the Play Menu (Fig. 5)
- The Game Options and BCI Options each go to their respective menus.
Game Options Menu
The main change in the Game Options menu from Emily’s original mockups are the selectors for the fine control of Elevation and Rotation as described in 2024-09-05 UI Review meeting.
- Both Elevation and Rotation fine control have a Precision selector and a Range selector.
- These selectors will have a slider to select discrete values from a predefined range.
- The selectors will change the number of SPOs in the “fan” layout in the ramp scene (Fig. 6).
- The number of columns in the fan will be defined by the rotation range divided by the rotation precision, i.e.:
num_fan_columns = rot_range / rot_precision - The number of rows in the fan will be defined by the elevation range divided by the elevation precision, i.e.:
num_fan_rows = elev_range / elev_precision - The values for
num_fan_columnsandnum_fan_rowsmust be integers, so we need to determine whether to round fractions up or down.
- The number of columns in the fan will be defined by the rotation range divided by the rotation precision, i.e.:
- In the Game Options menu, below the selectors, an animation will demonstrate how the number of SPOs changes as the fine control selectors are adjusted. The dotted fan will have the maximum dimensions, and the solid fan will change in size depending on the elevation and rotation range selected.
- There will be a mechanism to control the selectors to prevent the total number of SPOs selected here from exceeding the maximum number of SPOs possible.
- The “Operator” section of the Game Options menu is the same as what Emily originally defined.
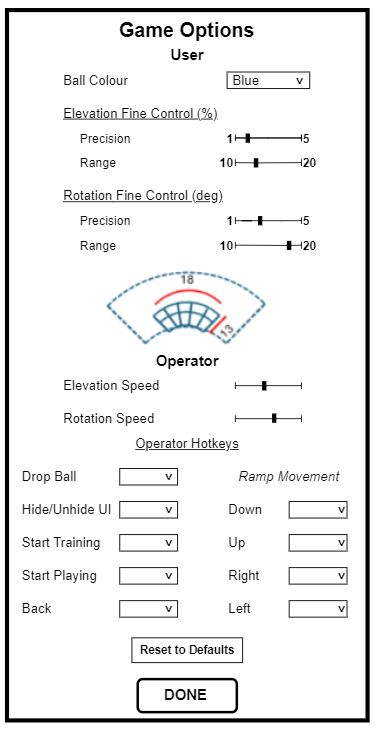
- The Done button will go back to the Start Menu.
BCI Options
The BCI Options menu (Fig. 4) will be the same menu as in Emily’s original mockup.
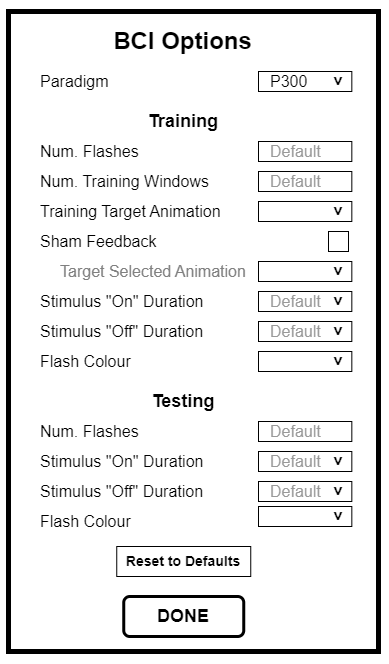
- If the “Sham Feedback” checkbox is ticked, the “Target Selected Animation” option will become active, i.e. the text will change to the regular colour and the dropdown can be opened.
- The “Num Flashes” and “Num Training Windows” options are input boxes.
- There will be guardrails for minimum, maximum and default values. If the user enters a value outside of the max/min guardrails, it will automatically set it to another value, e.g. if the user enters a value greater than the max value, it will change automatically back to the maximum value.
- The Done button will go back to the Start Menu.
Play Menu
This menu will not have the Menu View scene layout. Instead, when ‘Start’ is selected from the Start Menu, the camera will fly around to the “play” position: behind the ramp, with an inclination downwards. (The camera movement is a smooth transition rather than the “cut” between scenes from the old Unity application.) The Play Menu (Fig. 5) will appear as three buttons in this view, along with a persistent hamburger menu in the top right.
- After navigating to the Play Menu (Fig. 5) from the Start Menu, only the Training button should be enabled.
- Once the training is complete, the other two buttons will then be enabled as well.
- Please see the Ramp View section which describes what happens when each of the three Play Menu buttons are selected.
Hamburger Menu
This menu will remain in the top right corner of the Play Menu and the Ramp View screens. The hamburger menu is for quick navigation and will contain the following options:
- Game Options
- BCI Options
- Ramp Setup
- Play Menu
- Quit Game
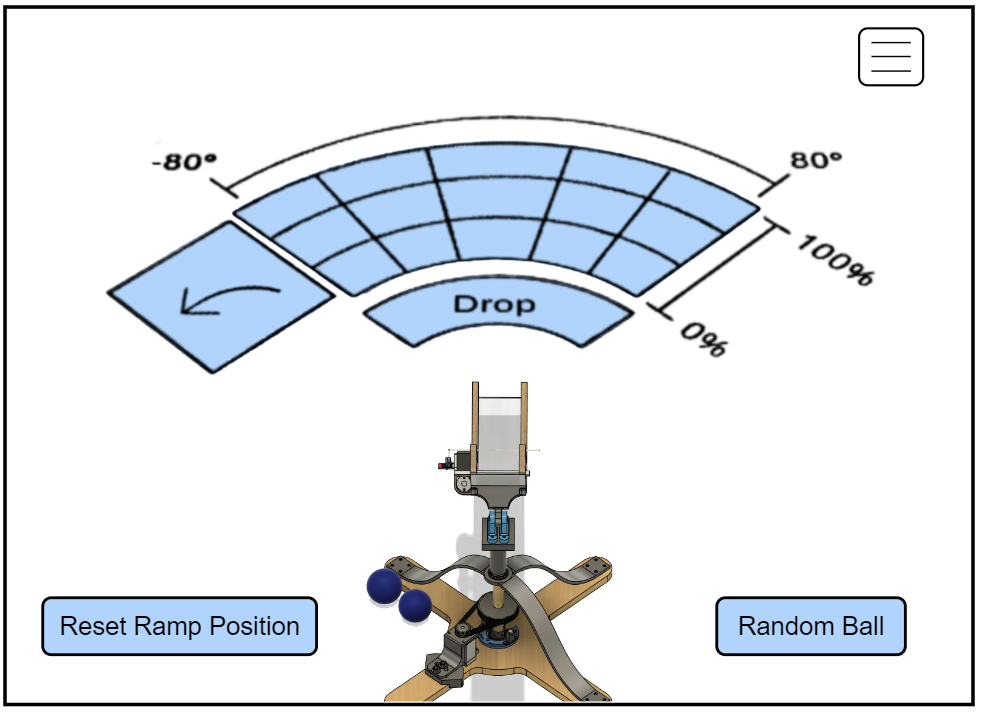
Ramp View
The Ramp View (Fig. 6) is the scene that includes the SPOs, for BCI training or for BCI control of the ramp. The SPOs are in blue. This view, like the Play Menu, has the camera in the “play” position (behind the ramp with an inclination downwards).
Navigation to the Ramp View occurs from the Play Menu, as follows:
Training
After navigating to the Play Menu (Fig. 5) from the Start Menu, only the Training button should be enabled. Selecting the Training button will display the Ramp View.
- Training will be done on the maximum number of SPOs, including:
- The fan layout of the Ramp Control SPOs, with predefined X and Y dimensions.
- The Back button SPO which will go to the Play Menu
- The Drop Ball SPO
- SPO for reset ramp position
- SPO for random ball drop
- Training will begin when the Start Training hotkey is pressed.
- After the training is completed, the SPOs will disappear and the Play Menu (Fig. 5) will be displayed again, with the Play Boccia! and Virtual Play buttons now enabled.
Play Boccia!
When the Play Boccia! button is selected, the Ramp Setup menu (Fig. 7) will extend from the button.
Ramp Setup Menu
This menu will be the same as Emily previously defined. In this menu the operator will connect to the physical ramp through Serial communication and calibrate the motors.
- The Back button will collapse the Ramp Setup menu and return to the normal Play Menu.
- The Done button will proceed to the Ramp View (Fig. 6) and the player will be able to control the physical ramp with BCI (see below).
- This ensures the user first connects to the ramp via the serial port and calibrates the ramp before BCI control of the ramp can begin.
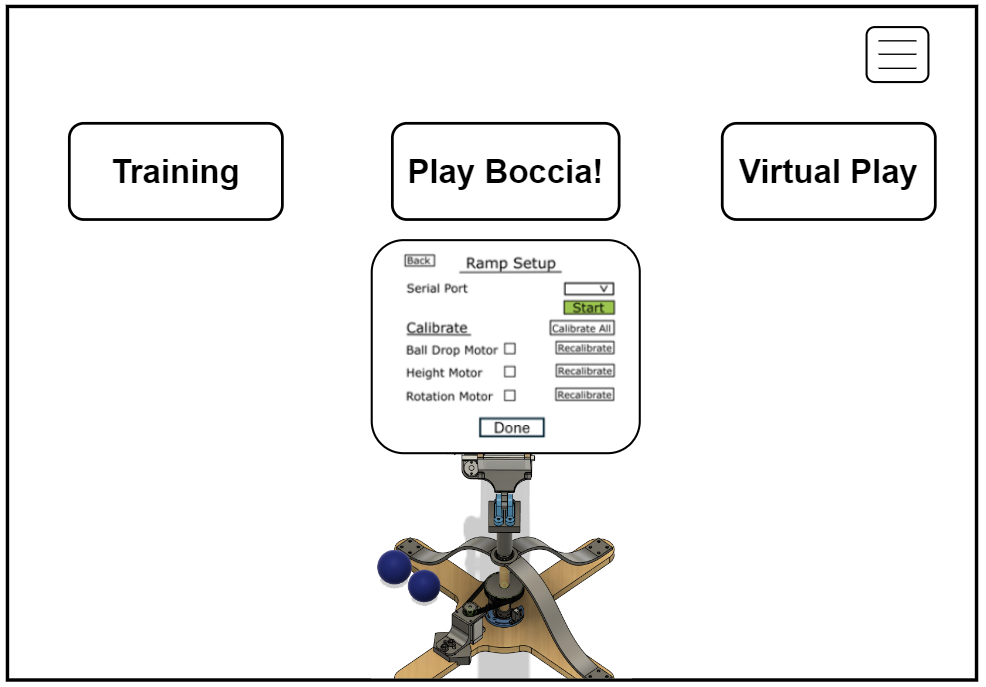
Play Boccia! scene
After the ramp setup process is complete, the Done button in the Ramp Setup menu will navigate to the Ramp View (Fig. 6). Now the player will control the physical ramp through BCI (see Ramp Control).
Virtual Play
The Virtual Play button will go the Ramp View (Fig. 6). Instead of controlling the physical ramp, the player will be able to control the virtual ramp using BCI (see Ramp Control).
Ramp Control
Operating the ramp with BCI (either in the Play Boccia! mode or the Virtual Play mode) is done via the fan mechanism displayed in the Ramp View.
- First, the full fan is displayed. This is the fan with the maximum number of SPOs and the same size as the fan from the training.
- The number of SPOs in the full fan is predetermined within the range of the ramp. For example, the range of rotation could be from -80 degrees to +80 degrees, while the range of elevation is from 0% to 100%.
- Each “square” in the fan shape is a different SPO.
- From the full fan, the Back Arrow button will go to the Play Menu.
- The player would select one of the SPOs from the fan mechanism as the first selection, and the ramp would move to that location as a general movement (gross control).
- From there, a fan for fine control would be overlaid on top of the full size fan.
- The number of SPOs in the fine control fan are determined by
num_fan_columnsandnum_fan_rowsas selected in the Game Options menu - the total number of fine control SPOs will be less than or equal to the maximum number of SPOs included in the full fan. - From its position after the first selection, the player will use the fine control fan to further adjust the elevation and rotation of the ramp in smaller increments.
- From the fine control fan, the Back Arrow button will go back to the full fan.
- The Drop SPO will release the ball.
- The Reset Ramp Position will move the ramp to its initial location.
- The Random Ball Drop will trigger the ramp to move to a random position and release the ball from there.